Simplifying Pending Advance Payments with Tally Prime
The Pending Advance and Stale Cheques/Instrument reports in Tally Prime provide detailed information on pending financial transactions, such as salary advances and overdue instruments like cheques. These reports offer valuable insights for tracking and managing outstanding advances and stale financial instruments, helping businesses maintain financial control and prevent overdue payments.
1. Pending Advance Report in Tally Prime
The Pending Advance report helps you track pending salary advances and other similar transactions. This report is crucial for managing advances given to employees or third parties that are yet to be settled.
Steps to Access Pending Advance Report:
1. Open Tally Prime and Load the Company:
- Start Tally Prime and load the company whose stock items you want to verify.
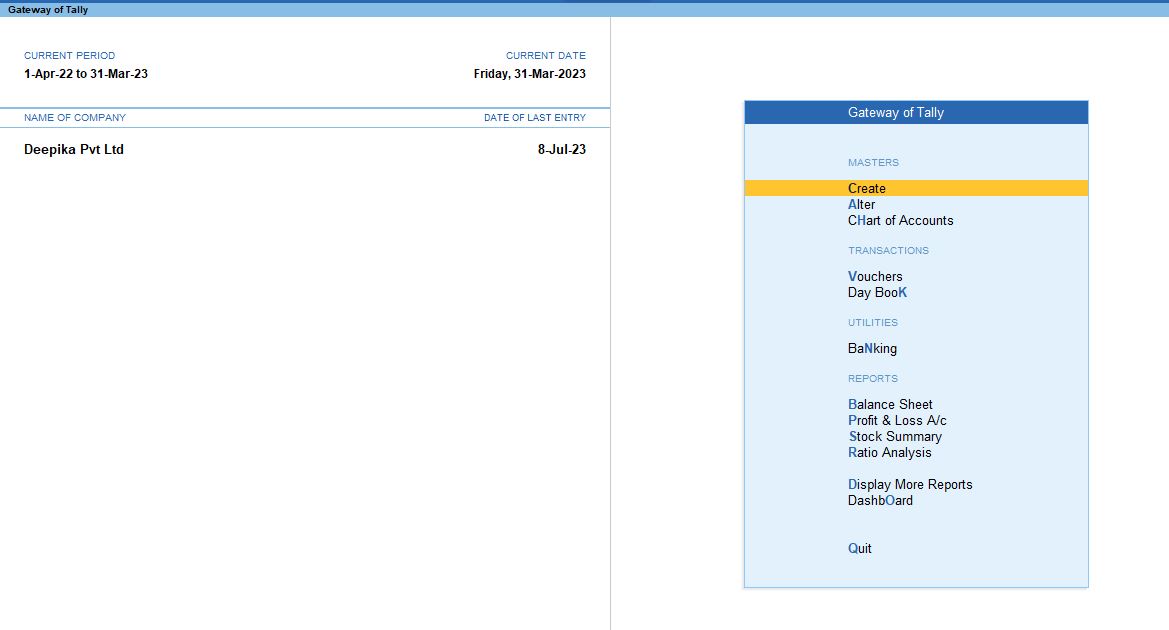
2. Go to Gateway of Tally:
- From the main screen (Gateway of Tally), you can navigate to the verification tools.
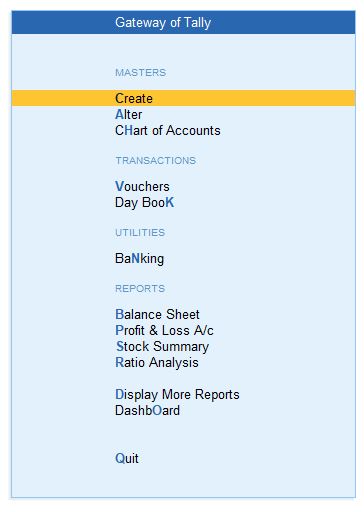
3. Navigate to Display More Reports:
- Press D (or click on Display More Reports) from the Gateway of Tally screen.
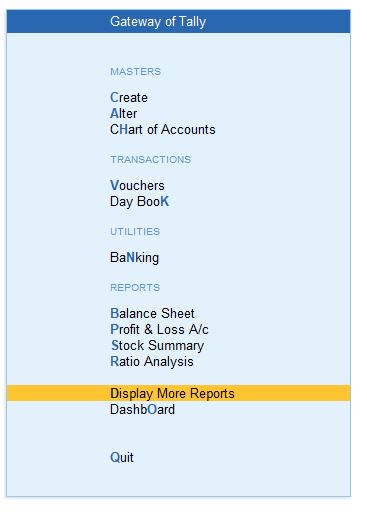
4. Go to Analysis & Verification:
- In the Display More Reports menu, choose Analysis & Verification. This section contains various tools for reviewing and verifying your data..
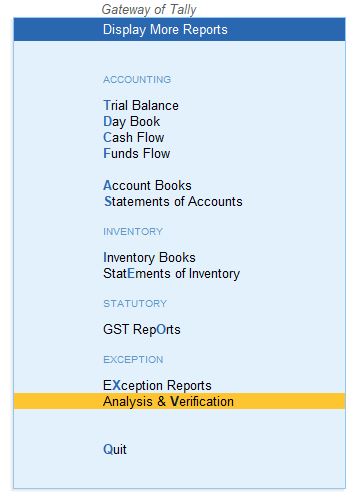
5. Select Data Analysis:
- From the Analysis & Verification menu, select Data Analysis. This will open up a list of data analysis tools.
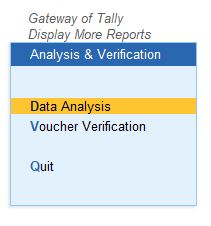
6. Choose Pending Advance:
In the Data Analysis section, select Pending Advance. This report helps verify the Pending Advance and their respective transactions for the selected financial year or period.
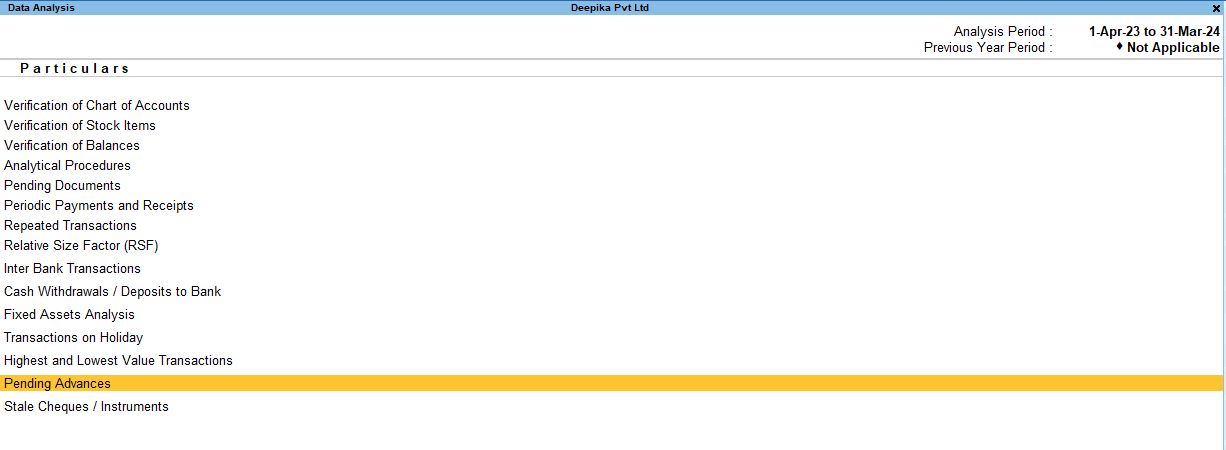
1. Select the appropriate category (e.g., Advance Salary) and press Enter to view the report.

2. Press F6: Monthly to display the data in a monthly format, showing advances on a month-by-month basis.

F12 Configuration Options for Pending Advance Report:
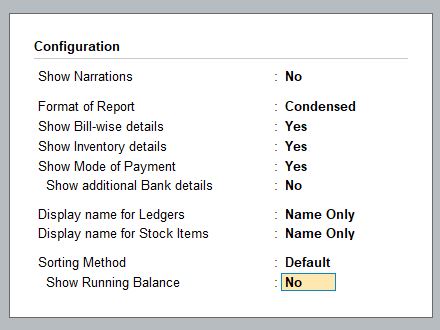
Once inside the Pending Advance report, you can customize the display using F12: Configuration. Here’s what each option does:h4>F12 Configuration Options for Pending Advance Report:
- Show Narration: No – Hides any narration or description associated with the transactions to simplify the view.
- Format of Reports: Detailed – Provides a detailed view of each transaction, including amounts and dates.
- Show Bill Wise Details: Yes – Displays the bill-wise breakdown of the advance transactions.
- Show Inventory Details: Yes – Shows details of any inventory involved in the transactions.
- Display Name for Ledger: Name Only – Shows only the ledger name without additional details.
- Display Name for Stock Items: Name Only – Displays only the name of stock items, if any, without extra information.
- Sorting Method: Default – Uses the default sorting order for transactions.
- Show Running Balance: No – Hides the running balance of advances to keep the report concise.
F8: Columnar Report for Pending Advance
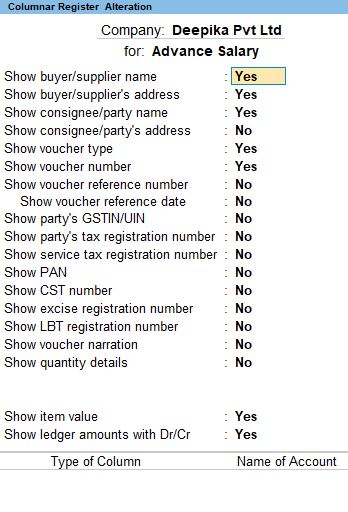
You can further analyze the Pending Advance data using the Columnar format. Press F8 to switch to a columnar view and configure the display as needed:

- Show Buyer/Supplier Name: Yes – Displays the names of buyers or suppliers involved in the transactions.
- Show Buyer/Supplier Address: Yes – Shows the address of the buyer or supplier for further clarity.
- Show Consignee/Party Name: Yes – Displays the name of the consignee or party involved in the transaction.
- Show Consignee/Party Address: No – Hides the address of the consignee or party to keep the report focused.
- Show Voucher Type: Yes – Displays the type of voucher used in the transactions (e.g., receipt, payment).
- Show Voucher Number: Yes – Shows the voucher number for easy reference.
- Show Voucher Reference Number: No – Hides the voucher reference number to simplify the view.
- Show Party’s GSTIN/UIN: No – Hides the GSTIN/UIN number of the party involved.
- Show Party’s Tax Registration Number: No – Hides the tax registration number.
- Show PAN: No – Hides the PAN details.
- Show CST Number: No – Hides the CST registration number.
- Show Excise Registration Number: No – Hides the excise registration details.
- Show LBT Registration Number: No – Hides the LBT registration number.
- Show Voucher Narration: No – Hides the narration linked to the voucher.
- Show Quantity Details: No – Hides the quantity of stock items involved in the transaction.
- Show Item Value: Yes – Displays the value of stock items in the transactions.
- Show Ledger Amounts with Dr/Cr: Yes – Shows debit and credit amounts linked to the ledger for better clarity on the financial impact.
Next: Change View
Next: Change View You can change the view in the report to gain different perspectives on the data. Tally allows you to switch between monthly and detailed views for better analysis of pending advances over time.
2. Stale Cheques/Instrument Report in Tally Prime
The Stale Cheques/Instrument report helps you track cheques and other financial instruments that have not been presented or have become stale (expired). This is essential for preventing financial discrepancies due to unpresented cheques.
Steps to Access Stale Cheques/Instrument Report:
1. Go to Gateway of Tally:
- From the main screen (Gateway of Tally), you can navigate to the verification tools.
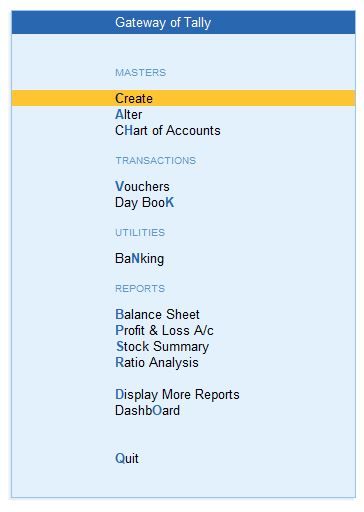
2. Go to Gateway of Tally:
- From the main screen (Gateway of Tally), you can navigate to the verification tools.

3. Navigate to Display More Reports:
- Press D (or click on Display More Reports) from the Gateway of Tally screen.

4. Go to Analysis & Verification:
- In the Display More Reports menu, choose Analysis & Verification. This section contains various tools for reviewing and verifying your data..

5. Select Data Analysis:
- From the Analysis & Verification menu, select Data Analysis. This will open up a list of data analysis tools.

5.Choose Pending Advance:
In the Data Analysis section, select Stale Cheques/Instrument. This report helps verify the Stale Cheques/Instrument and their respective transactions for the selected financial year or period.
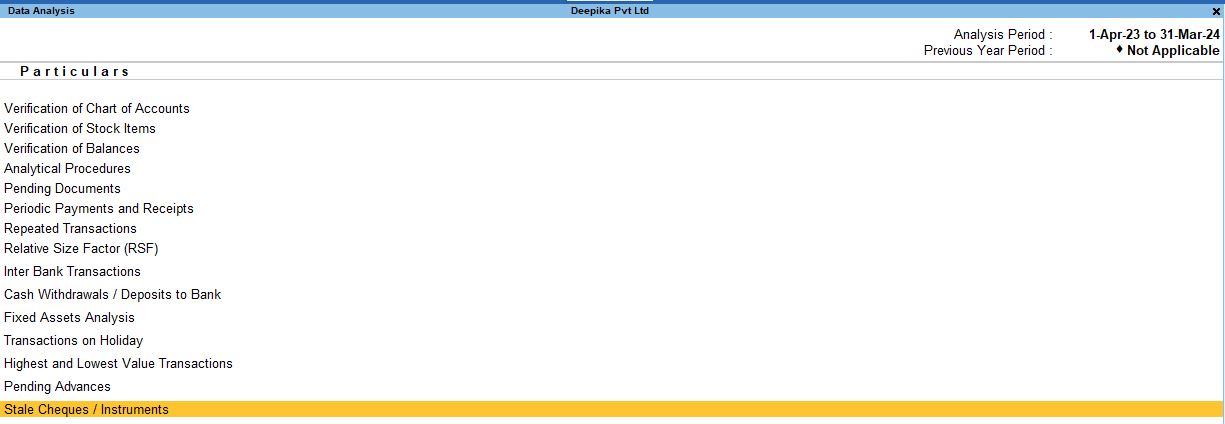
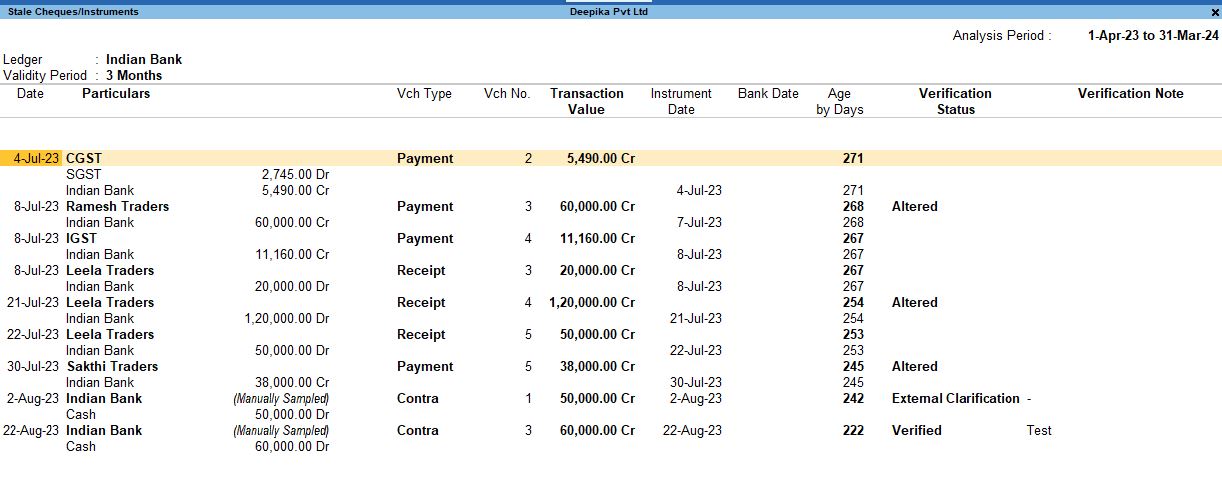
1. Select the appropriate bank (e.g., Indian Bank,) and press Enter to view the list of stale or unpresented cheques.

This report shows the stale cheques or instruments that are yet to be cleared by the bank and helps in following up with concerned parties.
Conclusion:
The Pending Advance and Stale Cheques/Instrument reports in Tally Prime are vital tools for managing financial transactions that are pending or overdue. By using the F12 Configuration and Columnar Report (F8) options, you can customize these reports to focus on the most relevant details, such as bill-wise data, ledger amounts, and buyer/supplier information. This helps in keeping track of outstanding advances and preventing stale or overdue financial instruments from causing issues in financial reporting. These features enhance your ability to manage advances and cheque-related transactions, ensuring that your company stays on top of its financial commitments.
Tally Prime
Learn All in Tamil © Designed & Developed By Tutor Joes | Privacy Policy | Terms & Conditions