Pending Documents Reports in TallyPrime: Track and Manage Pending Transactions
In Tally Prime, you can access a variety of reports for managing pending documents, analyzing outstandings, and reviewing periodic payments and receipts. These reports help you monitor cash flow, keep track of receivables and payables, and analyze transaction patterns. Let’s break down each of the options mentioned and explain how to use them step by step.
This report helps you track pending documents, such as unpaid bills, invoices, and other outstanding transactions.
Steps to Access Pending Documents Report:
1. Open Tally Prime and Load the Company:
- Start Tally Prime and load the company whose stock items you want to verify.
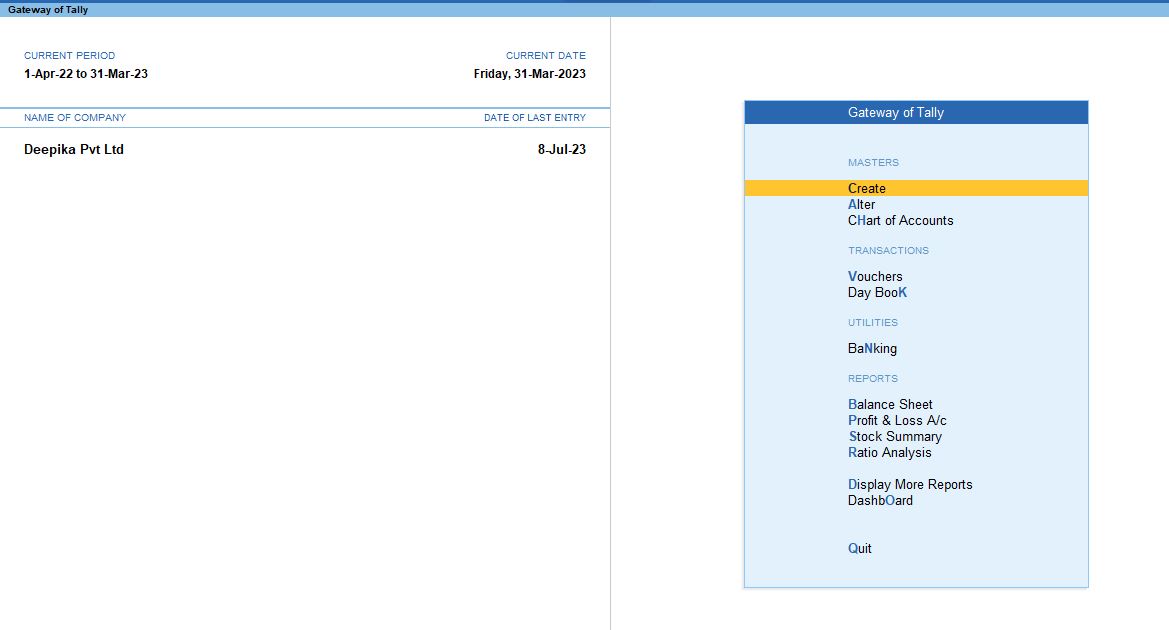
2. Go to Gateway of Tally:
- From the main screen (Gateway of Tally), you can navigate to the verification tools.
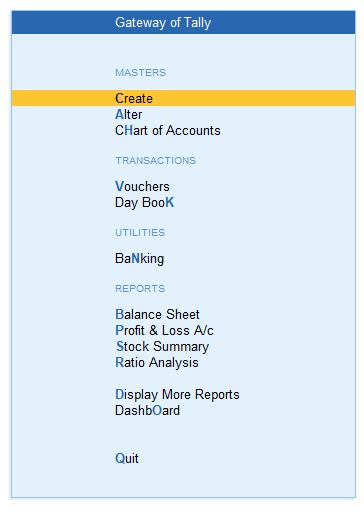
3. Navigate to Display More Reports:
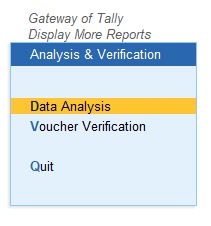
- Press D (or click on Display More Reports) from the Gateway of Tally screen.
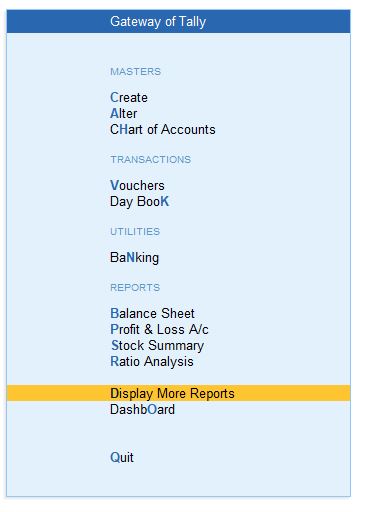
4. Go to Analysis & Verification:
- In the Display More Reports menu, choose Analysis & Verification. This section contains various tools for reviewing and verifying your data.
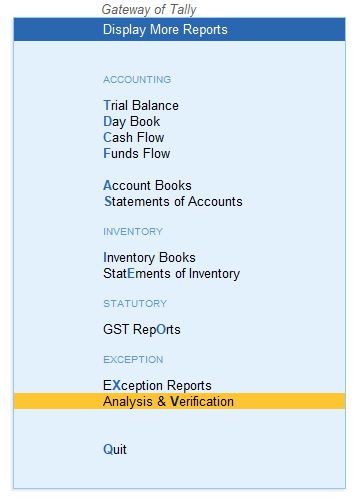
5. Select Data Analysis:
- From the Analysis & Verification menu, select Data Analysis. This will open up a list of data analysis tools.
6. Choose Pending Documents:
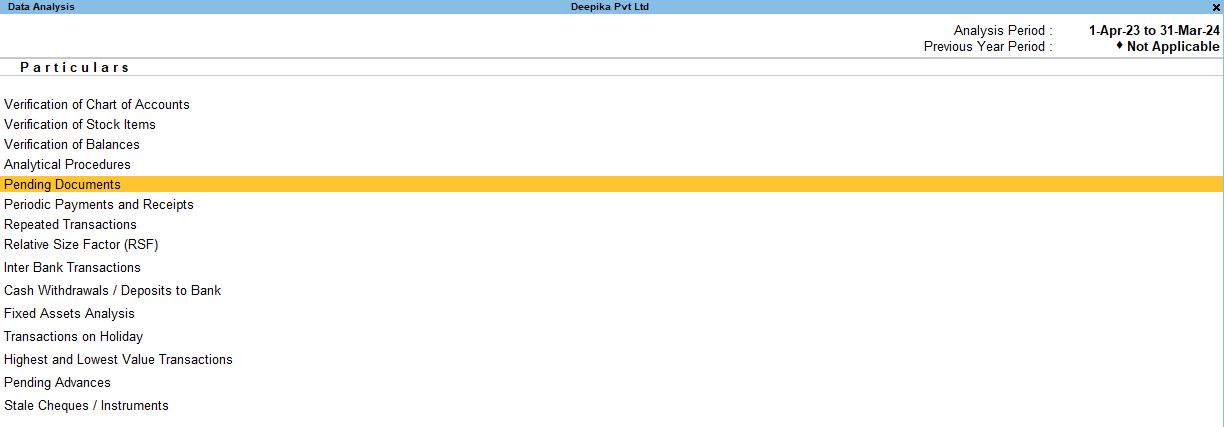
- In the Data Analysis section, select Pending Documents. This report helps verify the Pending Documents and their respective transactions for the selected financial year or period.
Outstandings → Nett Pending Receivables.

F12: Configuration Options for Pending Documents Report:
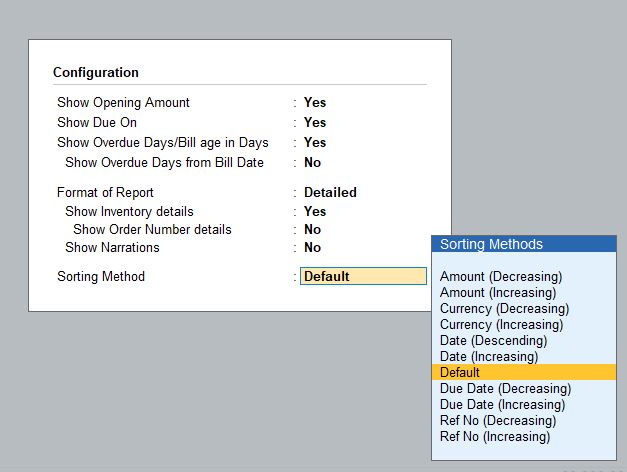
Once in the Pending Documents report, you can customize how the data is displayed by using the F12 Configuration options:
Show Opening Amount: Yes – Displays the opening balance or amount due at the start of the period.
Show Due On: Yes – Shows the due date for each outstanding bill or receivable.
Show Overdue Days Bill Age in Days: Yes – Displays the number of days the bill has been overdue.
Format of Reports: Detailed – Shows a detailed view of all outstanding bills and documents.
Show Inventory Details: Yes – Includes the stock/inventory details related to each pending document, if applicable.
Sorting Method: Default – Uses the default sorting order, typically based on date or alphabetical order.
F6: Ageing Methods:
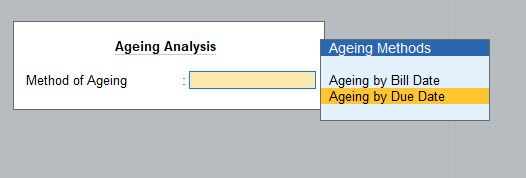
- Ageing Analysis helps you analyze the age of pending receivables or payables.
- Method of Ageing: Choose Ageing by Due Date to group pending bills based on their due date, making it easy to see which receivables or payables are overdue.
Periodic Payment and Receipts Report
This report allows you to view payments and receipts that occur periodically, which is useful for managing regular transactions with vendors and customers.
Steps to Access Periodic Payment and Receipts Report:
1. Go to Gateway of Tally:
- From the main screen (Gateway of Tally), you can navigate to the verification tools.
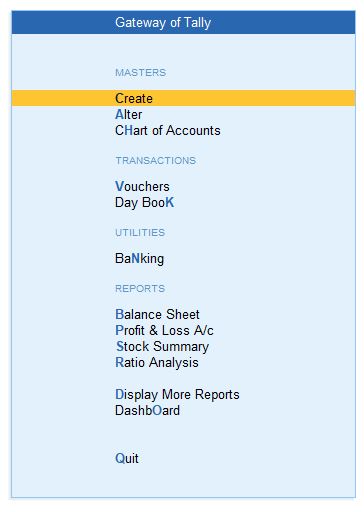
2. Navigate to Display More Reports:
- Press D (or click on Display More Reports) from the Gateway of Tally screen.
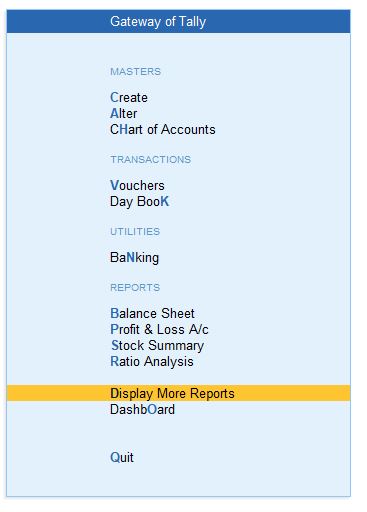
3. Go to Analysis & Verification:
- In the Display More Reports menu, choose Analysis & Verification. This section contains various tools for reviewing and verifying your data.
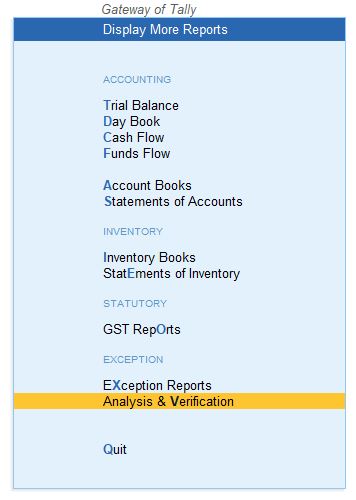
4. Select Data Analysis:
- From the Analysis & Verification menu, select Data Analysis. This will open up a list of data analysis tools.
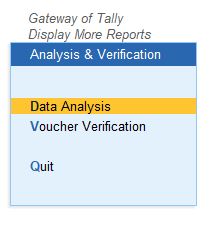
5. Choose Pending Documents:
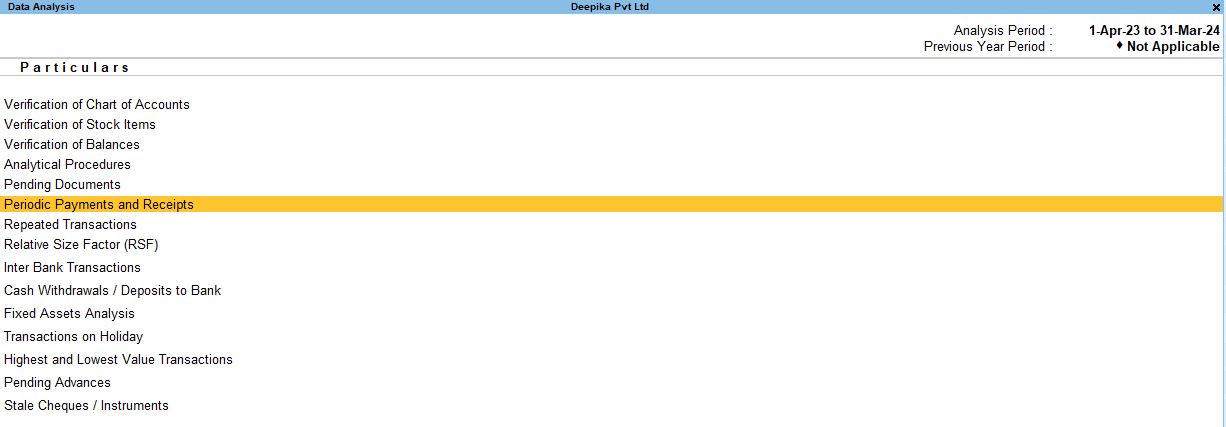
- In the Data Analysis section, select Periodic Payment and Receipts. This report helps verify the Periodic Payment and Receipts and their respective transactions for the selected financial year or period.
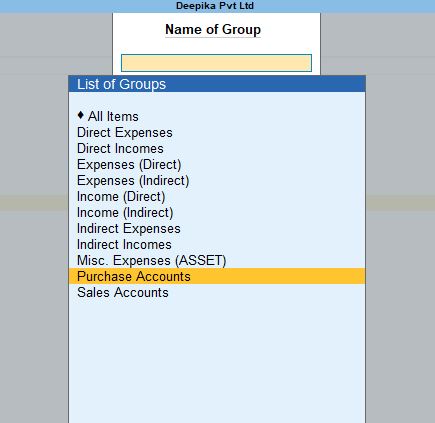
1. Select the Purchase Accounts option to view recurring transactions related to purchases.

3. Repeated Transactions Report
This report shows transactions that occur repeatedly, allowing you to analyze patterns in payments, receipts, and other financial transactions.
Steps to Access Repeated Transactions Report:
1. Go to Gateway of Tally:
- From the main screen (Gateway of Tally), you can navigate to the verification tools.
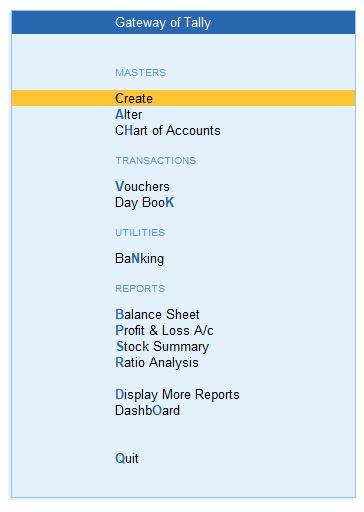
2. Navigate to Display More Reports:
- Press D (or click on Display More Reports) from the Gateway of Tally screen.
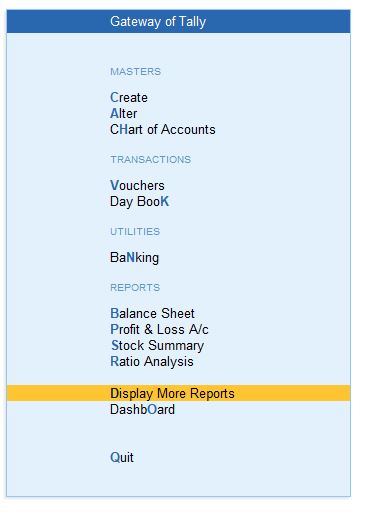
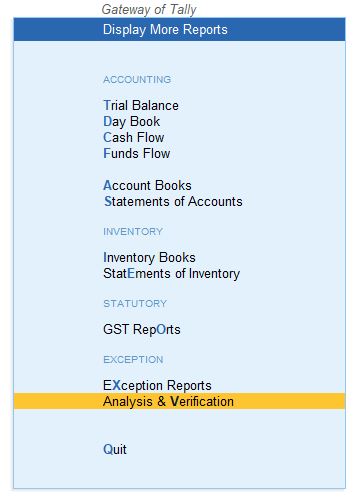
3. Go to Analysis & Verification:
- In the Display More Reports menu, choose Analysis & Verification. This section contains various tools for reviewing and verifying your data.
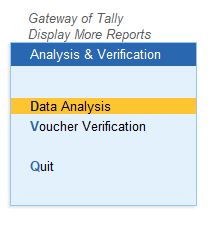
4. Select Data Analysis:
- From the Analysis & Verification menu, select Data Analysis. This will open up a list of data analysis tools.
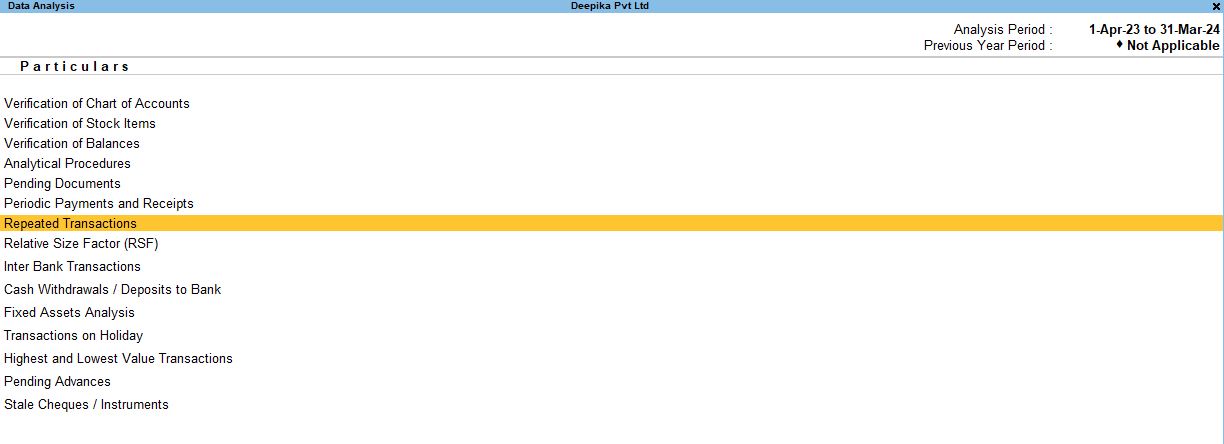
5. Choose Repeated Transactions:
- In the Data Analysis section, select Repeated Transactions. This report helps verify the Repeated Transactions and their respective transactions for the selected financial year or period.
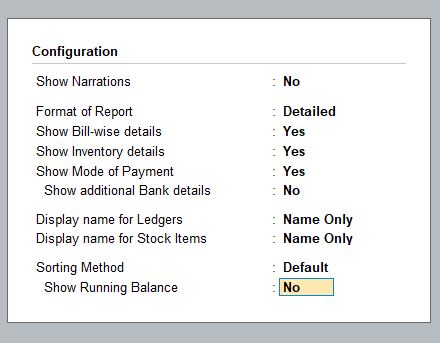
F12: Configuration Options for Repeated Transactions Report:
You can customize the repeated transactions report with the following options:
- Show Narration: No – This hides the narration or descriptions of the transactions, keeping the report concise.
- Format of Reports: Detailed – Displays a detailed view of all repeated transactions.
- Show Bill-Wise Details: Yes – Displays individual bills related to each transaction.
- Show Inventory Details: Yes – Displays stock or inventory details associated with repeated transactions.
- Display Name for Ledger: Name Only – Shows only the ledger name without any additional identifiers.
- Display Name for Stock Items: Name Only – Shows only the stock item name.
- Sorting Method: Default – Uses the default sorting order.
- Show Running Balance: No – Hides the running balance for each ledger, focusing only on the transactions.

4. Relative Size Factor (RSF) Report
The Relative Size Factor (RSF) report is used to detect any unusual transactions by comparing transaction sizes against historical data. It helps identify anomalies or discrepancies in transaction values.
Steps to Access RSF Report:
1. Go to Gateway of Tally:
- From the main screen (Gateway of Tally), you can navigate to the verification tools.
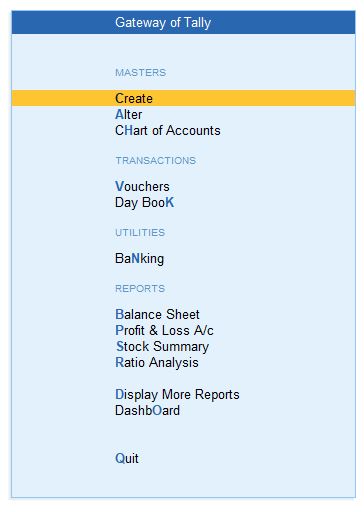
2. Navigate to Display More Reports:
- Press D (or click on Display More Reports) from the Gateway of Tally screen.
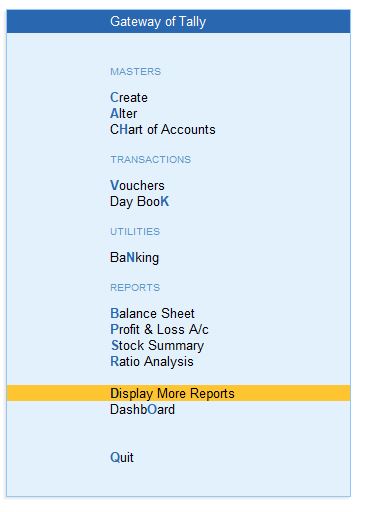
3. Go to Analysis & Verification:
- In the Display More Reports menu, choose Analysis & Verification. This section contains various tools for reviewing and verifying your data.
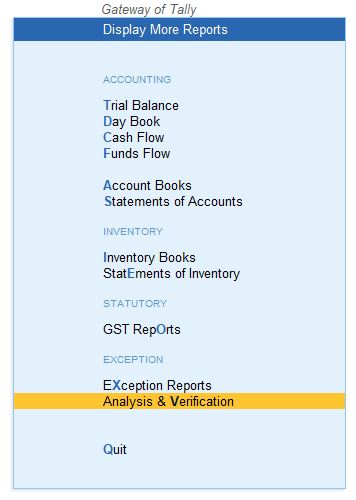
4. Select Data Analysis:
- From the Analysis & Verification menu, select Data Analysis. This will open up a list of data analysis tools.
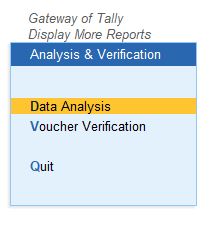
5. Choose Relative Size Factor (RSF):
- In the Data Analysis section, select Relative Size Factor (RSF). This report helps verify the Relative Size Factor (RSF)and their respective transactions for the selected financial year or period.
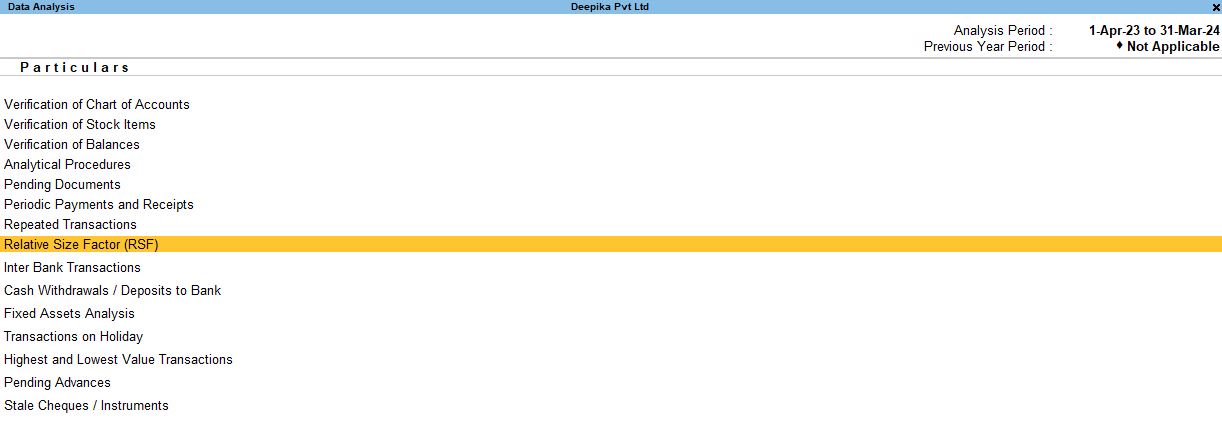
This report highlights any significant outliers based on the Relative Size Factor formula, helping to flag potential errors or unusual entries that may need further investigation.

Conclusion:
These options within Tally Prime help you maintain accurate records, track pending documents and payments, and analyze financial data for better decision-making.
- Pending Documents Report is essential for tracking outstanding invoices and bills.
- Periodic Payment and Receipts allow you to monitor regular transactions.
- Repeated Transactions show transaction patterns, helping in identifying trends.
- Relative Size Factor (RSF) flags unusual transaction values for closer inspection.
Tally Prime
Learn All in Tamil © Designed & Developed By Tutor Joes | Privacy Policy | Terms & Conditions